Glass Bottle Scarf

This reversible scarf was designed with cold weather in mind. The pattern stitch is incredibly easy, so the knitting can get tedious, but is suitable for beginners. The lacy eyelets give the scarf some texture while trapping in warmth; they remind me of bubbles trapped in glass.

Craft: knitting
Skill Level: Rookie-Apprentice-Virtuoso-Genius
Skills: knit, purl, YO, P2tog

Sizes: XXXL (or half size)
Finished Measurements: 8″ wide x 110″ long for full size lying flat (including tassels)

Gauge: not important, 24 sts and 22 rows = 4″ on 5.5 mm in patt (14 sts = 4″ on 6 mm as given on ball band)
Yarn: approx. 375g, 716 yds (655 m) bulky weight yarn
Suggested Brand: 1.5 skeins Cascade Eco+ shown in 8462

Needles/Hooks: 5.5 mm straight needles
Other Materials: tapestry needle or teeny crochet hook

Notes and Tips:
> Make your YOs by wrapping the yarn over the top of the right needle towards the back and bringing it to the front between the needles, P the next st as per normal.
> For amazing tassel making instructions, check out my “Seaflower Scarf”, another free and super easy scarf pattern.

Instructions:

CO 48 sts, or a multiple of 4 sts (24 sts for half size).

Row 1: K2, P2 to end.
Row 2: *K2, P1, YO, P1*, rep from * to * to end.
Row 3: K3, P2.
Row 4: K2, P2tog, P1.

Repeat rows 2- 4 until scarf is desired length.
BO loosely.

Cheat Sheet:

    * If you see P2, K2, facing you on the needles   
      (last row worked), work Row 2
    * If you see K1, YO, K1, P2, work Row 3
    * If you see K2, P3, work Row 4

    Triton’s Thinking Cap

    It doesn’t get much easier than this! Suitable for beginners, but it’s also a fun, quick pattern for more experienced crocheters. This hat is wonderfully comfy and warm making it a great thinking cap. Will work with most yarn types and weights. 
    Craft: crochet
    Skill Level: Rookie-Apprentice-Virtuoso-Genius
    Skills: ch, hdc, bphdc

    Sizes: adult medium (22″ circumference) and large (24″ circumference) with instructions to adjust
    Finished Measurements: (of example shown, size medium) 8″ long x 11″ across lying flat

    Gauge: approx. 8.5 sts and 8 rows = 4″ with 10 mm in patt;
    14 sts = 4″ with 6 mm (as given on ball band)
    Yarn: approx. 100g bulky yarn, 2 strands held together; (you may substitute a different weight – see instructions for more details)
    Suggested Brand: 2 balls Diamond Tempo Chunky

    Needles/Hooks: 10 mm (or to match yarn)
    Other Materials: tapestry needle or teeny crochet hook, scrap yarn

    Notes and Tips:
    • The decreases are worked with two strands of chunky yarn in mind. If you are substituting a different yarn that is much smaller, you may end up with a bit of a funny crown. My advice on this would be to rep Dec Rnd 1-2 once more before completing Rnd 3 and 4.
    • There will be a slight seam at the back of your hat – make sure you use a marker (a piece of scrap yarn works well) for the beg of your rnd and that you start your new rnd with the correct st.

    Note on yarn:

    Getting gauge with this hat can be a little tricky, but it’s very versatile. My advice is to choose two strands of the yarn that you like, as long as it’s worsted weight or heavier. I like the effect of huge stitches by doubling bulky yarn, but the hat will work well with almost anything. The thicker your yarn, the faster it crochets up!

    This hat is worked with a multiple of 4 sts + 1.

    If you aren’t using the recommended brand of yarn, ch enough sts so that the strand fits comfortably around your head (or the recipient’s head); don’t pull the strand really tight or else your hat will give you a headache.

    For an accurate measurement, make sure to measure around your ears and forehead, not the crown of your head. Now, count your sts and make sure the number is divisible by 4, + 1. (Ex. 52 +1 = 53 chs not including the one on your hook).

    If you are a little more experienced, another method for figuring out how many sts to ch would be to make a gauge swatch, measure your head with a measuring tape and then figure out how many sts per inch you have on your swatch and multiply it to fit the circumference, making sure it’s still divisible by 4 + 1.

    Instructions:

    Ch 40 (44) sts + 1 (or the number according to your yarn type); join in the rnd with a sl st, being careful not to twist your sts. Pm for beg of rnd.

    Rnd 1: hdc (half-double crochet) in each st around.
    Rnd 2: bphdc (back post half-double crochet) in each st around.

    Repeat these two rnds 5 times total or until hat measures approx. 4-5″.

    Dec Rnds:
    Rnd 1: *hdc in next 2 sts, work 1 dec over next 2 sts as follows: *insert hook in next st, YO, pull through*, rep from * to * once more, YO, pull through all 3 sts*, rep from * to * to end of rnd.
    Rnd 2: bphdc in each st around.
    Rnd 3: *hdc in next st, work 1 dec over next two sts*, rep from * to * to end of rnd.
    Rnd 4+: work 1 dec over next 2 sts until hat is closed up; cut yarn and tie off. Weave in ends.

    Viking Scarf

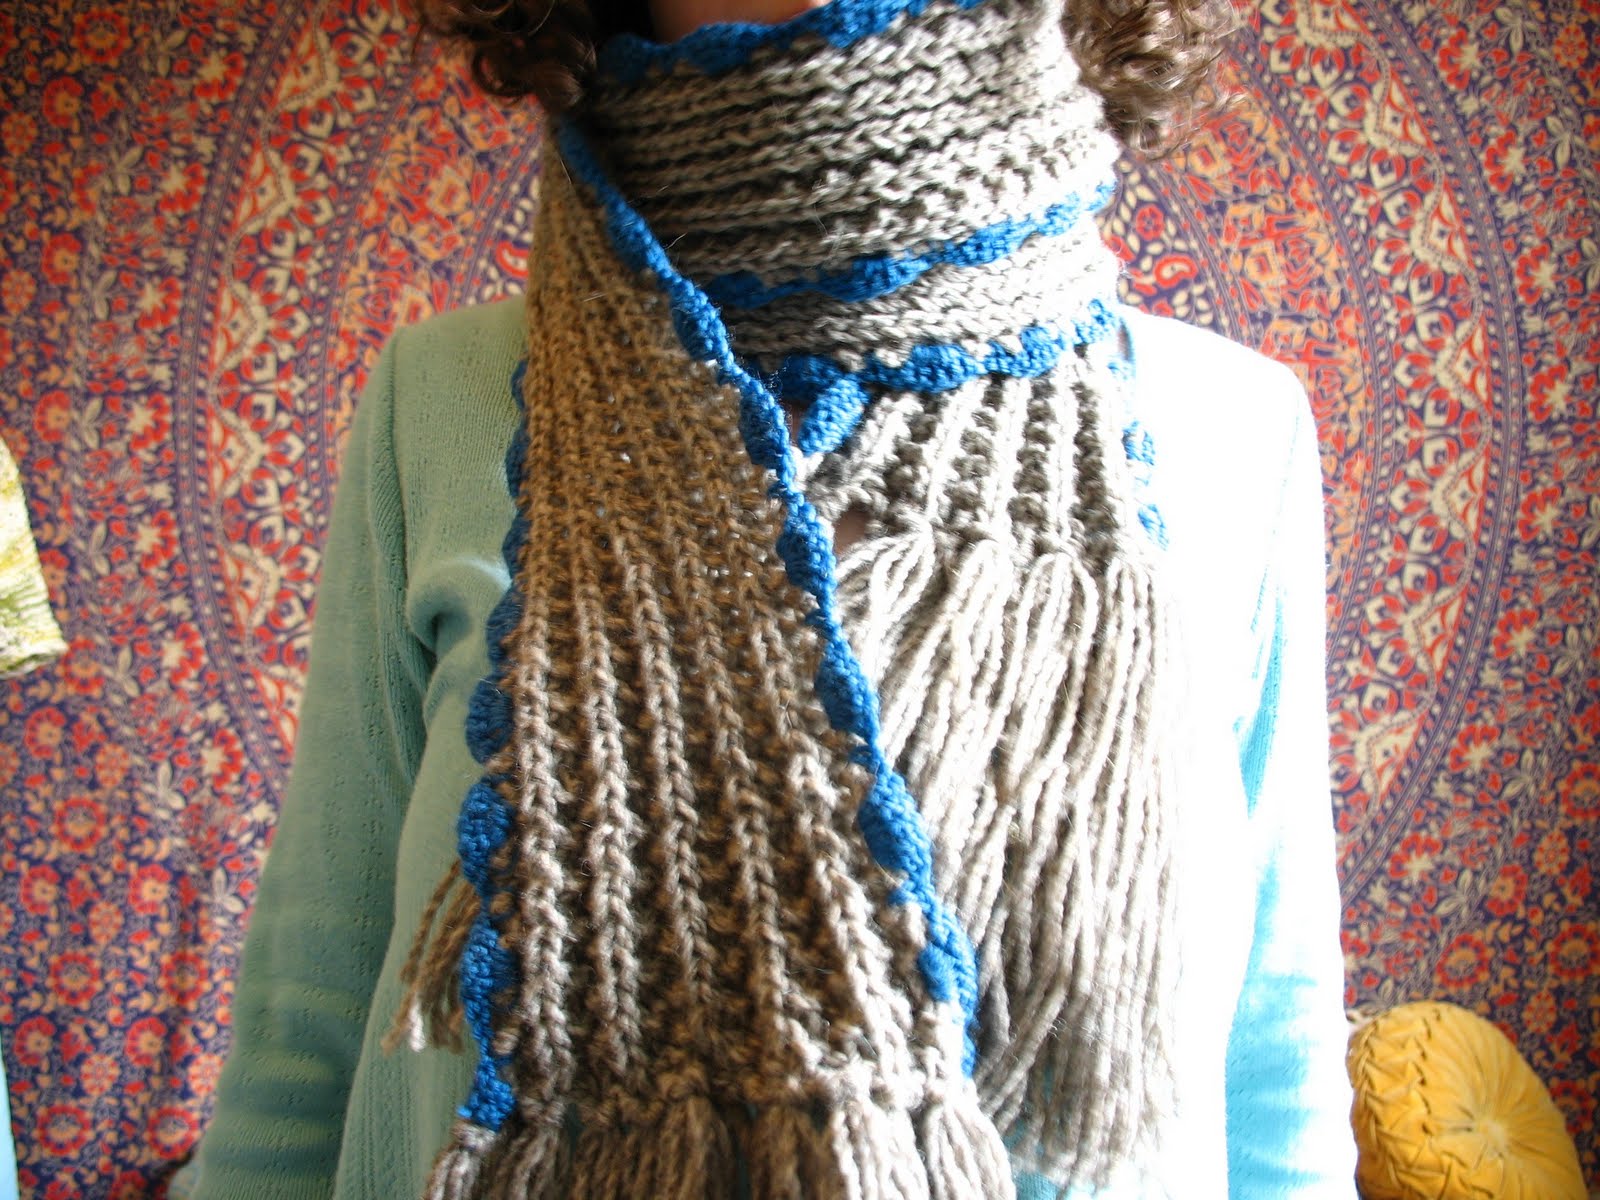
    This scarf is stretchy and cozy, super easy yet effective. The instructions are written to accommodate most yarn weights, giving you a lot of freedom to choose any yarn you like. It is constructed of a simple “mistake rib” with a crocheted scallop trim.


    Craft:
    knitting and crochet
    Skill Level: Rookie-Apprentice-Virtuoso-Genius
    Skills: knit, purl, ch, sc, dc

    Finished Measurements: dependent on yarn

    Gauge: not too important, make a gauge swatch before casting on
    Yarn: (200g) of Main Colour, (50-100g of Trim)
    Note: sorry, but amount and yardage is dependent on the weight of yarn you choose. Ask for help at your local yarn shop.
    Recommended Brand: your choice; I used a worsted weight wool for the example, and a sport weight merino for the trim; you can mix and match yarn types and weights, but choose a medium weight yarn (avoid lace weight, fingering weight or anything too chunky)

    Needles/Hooks: match to your yarn according to the label; shown knitted with a worsted weight on 8 mm
    Other Materials: tapestry needle or teeny crochet hook

    Instructions:

    CO 36 sts, or an even number.
    Note: You may want to adjust the number of CO sts depending on the kind of yarn you choose and how big you want your scarf to be; I recommend making a gauge swatch in the rib patt before you CO. Check my “River Rock” pattern for more details on substituting yarns.

    Also, decide whether you like the size of needles you are using; for a squishier scarf you might want to use a larger size than what the ball band calls for.

    Rnd 1: *K2, P2*, rep from * to * to end.
    Rnd 2: K1, *P2, K2*, rep from * to * to last 3 sts, end P2, K1.

    Repeat these two rnds for rib patt until scarf is desired length, or until you run out of yarn. BO fairly loosely.

    Crocheted Scallop Trim:

    Choose your hook to match the yarn you are using (not to the knitting needles you used, unless it is the same weight of yarn).

    Attach the yarn at the corner of one end of your scarf. Insert hook through the first st at the side and pull yarn through. (1 loop on hook). You will be working along the long side.

    Set-Up: Ch 2. Work 2 dcs in same (first) st (half scallop).
    Next: *ch 1, sk X sts, sc, ch 1, sk X sts,  work 5 dcs (scallop)*, rep from * to * to end of scarf.
    Read following instructions for more details.

    Now what is this “X” business, you might ask? Where do I stick those 5 dcs? That is the trick to this scarf.
    Since you may be using two different weights of yarn, we can’t follow specific instructions on where to insert the scallops (5 dcs) and the scs along the side of your scarf. You may have to try a few scallops and rip it back if it isn’t sitting right.

    Try to imagine how wide your scallop will be (or just try a few), and then make the sc after skipping half that amount of space. Confused? It’s easier than it sounds, just give it a try.
    You will want the line of scallops to sit flat and even along the side of your scarf. Or if you like it to be frilly, then more power to you! 

    Cut yarn and weave in ends.

    For free instructions on making fantastic tassels, check out my “Seaflower Scarf”, another easy peasy (and free!) scarf pattern with thorough instructions for beginners.

    Antelope Hat

    There are some sweet, but simple details on this hat. There are instructions for a no-sew picot brim and cute little eyelets. This pattern is available in a slouch or beanie version.
    Craft: knitting
    Skill Level: Rookie-Apprentice-Virtuoso-Genius
    Skills: knit, purl, YO, K2tog, blocking
    Sizes: adult medium with instructions to adjust (fits approx. 21-22″ head)
    Finished Measurements: slouch – 9″ long, 20″ circumference; beanie – 6.5″ long, 20″ circumference (lying flat)
    Gauge: 18 sts x 36 rows = 4″ on 5 mm in patt; (18 sts = 4″ in st st on 5 mm as given on ball band)
    Yarn: 100g, 210 yds (192 m) worsted weight yarn (less for beanie)
    Suggested Brand: 1 skein Malabrigo Merino Worsted (fair warning: I found a lot of variation in the gauge with this yarn – always knit a gauge swatch before you cast on!)
    Needles/Hooks: 4 mm 16″ circular; 5 mm 16″ circular; 5 mm dpns
    Other Materials: tapestry needle or teeny crochet hook
    Notes and Tips:
    > Use a natural fibre that will respond to blocking.
    > For well-defined eyelets make your YOs loose.
    > The first YO of your rnd will likely wrap behind your marker – don’t make an extra YO at the end of your rnd.
    Instructions:

    With 4 mm needles, CO 88 sts (or multiple of 8).
    Join in rnd being careful not to twist sts, pm for beg of rnd.

    No-Sew Picot Brim: (or see below for alternatives)
    Rnd 1-2: knit
    Rnd 3 (eyelet rnd): *YO, K2tog*, rep from * to * to end of rnd.
    Rnd 4: knit

    Next (”sewing” up the edge): *insert needle into next st as if to K1tbl, fold CO edge up with the WS folding in towards you and pick up the corresponding purl st from the WS CO edge and place it on the needle, knit these two sts together; K1*, rep from * to * to end of rnd.

    Note: Don’t forget to skip one st on the CO edge when you are “sewing“ it up – you should be picking up every other st. You may choose to knit every st together instead of working a K1 – this makes a neater edge, but is harder on your hands.
    Also, be sure you are picking up the correct st from the WS, otherwise your picots will be skewed.

    Next: Knit 3 rnds.
    Next: work a K1, P1 rib for 5 rnds.

    Change to 5mm circs. Work the following 16 rnds twice for a beanie and 3 times for a slouch (or 4 or 5…).

    Rnd 1: purl
    Rnd 2-4: knit
    Rnd 5: purl
    Rnd 6 (eyelet): YO, K2 tog, rep to end of rnd.
    Rnd 7: purl
    Rnd 8-13: rep rnds 2-7.
    Rnd 14-16: knit

    Dec Rnds:
    Change to dpns when sts get too tight on circs.

    Rnd 1: *K5, K3tog, YO*, rep from * to * to end of rnd.
    Rnd 2 (and all even rnds): knit
    Rnd 3: *K4, K3tog, YO*, rep from * to * to end of rnd.
    Rnd 5: *K3, K3tog, YO*, rep from * to * to end of rnd.
    Rnd 7: *K2, K3tog, YO*, rep from * to * to end of rnd.
    Rnd 9: *K1, K3tog, YO*, rep from * to * to end of rnd.
    Rnd 11: *K3tog, YO*, rep from * to * to end of rnd.
    Rnd 12: knit
    Rnd 13: K2tog around.

    Cut yarn and pull through rem sts; weave in ends.

    Steam block with an iron and mist with a spray bottle; be firm with the brim so it doesn’t flip up.

    Variations on the brim:

    1. 1×1 rib: K1, P1 for 8 rnds
    2. 2×2 rib: K2, P2 for 8 rnds
    3. roll brim: knit until you have 1″ of st st above the top of the roll (measure from the roll, not the CO edge)
    4. OR work a roll brim combined with an inch (approx. 8 rnds) of rib


    Herringbone Hat

    This hat is squishy and stretchy making it warm, versatile and comfy. It is worked loosely on large needles for nice stitch definition. The hat is worked in the round but it could easily be adapted to be worked flat.

    Craft: knitting
    Skill Level: Rookie-Apprentice-Virtuoso-Genius
    Skills: long-tail cast on, K2tog

    Sizes: adult s (m, l)
    Finished Measurements: fits adult 22″ (23″, 24″)

    Gauge: 24 sts and 20 rows = 4” on 8 mm in patt, (16 sts = 4″ on 4.5 mm in st st as given on ball band); take time to check gauge
    Yarn: 100g, 220 yds (201 m) worsted weight yarn
    Suggested Brand: 1 skein Classic Worsted Long Print

    Needles/Hooks: 8 mm 16” circular, 8 mm dpns
    Other Materials: tapestry needle or teeny crochet hook

    Instructions:

    Read Notes and Tips before beginning.

    CO 100 (115-130) with long-tail method (important); join being careful not to twist sts and pm for beg of rnd.

    Rnd 1 (left slanting): *K2tog tbl slipping only the first st off the needle*, repeat from * to * to marker, sl m; repeat from * to * once more, then continue with Rnd 2
    Rnd 2 (right slanting): K2tog slipping only the first st off the needle; repeat to marker, slm

    Rep Rnds 1 and 2 until hat measures 5-6” from CO, ending with a Rnd 1.

    Dec Rnds:
    Work as established, making decs on Rnd 2 only. Work one dec by slipping both sts off the needle instead of just the first one (K2tog).
    On the first dec rnd, the dec should be worked every 5 sts (repeat the pattern stitch 3 times, then drop the 4th and 5th st).
    Then, every 4 sts and 3 sts. Then, K2tog until hat is closed up or until approx. 8 sts rem. BO and weave in ends. Add a pom-pom if you are into that kind of thing.

    Notes and Tips:
    • Keep your tension loose.
    • Use scrap yarn as a stitch marker instead of a traditional ring marker so it won’t get caught in the K2togs.

    A big thanks to Allison Blevins for the pattern stitch – check out her amazing scarf here: http://store.tangleonline.com/index.php?main_page=pr…

    Mediterranean Tulle Wrap

    Wearing this wrap makes me feel like royalty.  This is one of the easiest things you could make and it looks gorgeous. Mohair will keep you warm even though the pattern is loose and airy.

    Craft: knitting
    Skill Level: Rookie-Apprentice-Virtuoso-Genius
    Skills: knit, yarn over

    Sizes: one size
    Finished Measurements: approx. 28″ wide and 56 inches from end to end (lying flat – it’s stretchy though!)

    Gauge: 14 sts and 16 rows = 4” on 6 mm in st st (as given on ball band); gauge is not too important
    Yarn: 200g, 352 yds (321 m) bulky mohair
    Suggested Brand: 4 skeins Pingouin Ligne Noire (discontinued)

    Needles/Hooks: 10 mm 20″ or longer circular or straight needles
    Other Materials: tapestry needle or teeny crochet hook; 60″ of 0.5 cm ribbon (or ribbon of your choice); 4-8 small buttons (size isn’t crucial)

    Instructions:

    CO 61 sts (or an uneven number to the desired width).

    Row 1: Knit
    Row 2: *K2tog, YO*; rep from * to * to last st, knit

    Rep Row 2 only until wrap reaches desired length, or until you run out of yarn (leaving enough for bind off). BO very loosely. Weave in ends.

    Finishing:

    Cut your ribbon in half and be sure the ends won’t fray (stick them near a flame to melt the ends, depending on the fabric – careful!).

    Weave the ribbon through your wrap at one-inch intervals starting approx. 12 inches from one end.

    Using a needle and thread, arrange one end of the ribbon in a bow and sew a button on top of it making sure you are sewing it to at least two strands of yarn at the edge of the wrap.

    Repeat on the other side of the wrap pulling the ribbon so it is bunched as much as you would like.

    Repeat for opposite end.

    Fire Scarf

    This scarf is light and lacy, but knitted up with something like baby llama wool by Mirasol, it is cozy and warm. This pattern is easy to memorize and works well with most yarns.

    Craft: knitting
    Skill Level: Rookie-Apprentice-Virtuoso-Genius
    Skills: knit, purl, yarn over

    Sizes: one size
    Finished Measurements: approx. 4.5” across, 52” from end to end lying flat

    Gauge: not important
    Yarn: 100g, 164 yds (150 m) worsted or medium weight yarn
    Suggested Brand: 2 skeins Miski by Mirasol shown in 108

    Needles: 5.5mm straight or circular
    Other Materials: tapestry needle or teeny crochet hook

    Notes and Tips:
    • The yarn overs can be deceiving because you are going from a purl to a knit and may not actually need to wrap the yarn – be sure you are actually creating an extra stitch on your needle.

    Instructions:

    Multiple of 4 + 1.

    CO 29 sts.

    Row 1 (RS): K1, *yo, P3tog, yo, K1*, rep from * to end of row.

    Row 2: P2tog, yo, K1, yo, *P3tog, yo, K1, yo*, rep from * to last 2 sts, P2tog.

    Rep these two rows until scarf reaches desired length. BO and weave in ends.

    Mountain Nights Toque

    Here is a slightly slouchy hat with a couple of ribbed bands around the brim. It’s super cozy and knits up like a dream: very easily.
    Ideal for those who are just starting to learn how to knit hats.

    Craft: knitting
    Skill Level: Rookie-Apprentice-Virtuoso-Genius
    Skills: knit, purl, K2tog

    Sizes: adult medium (fits approx. 21-23″ circumference)
    Finished Measurements: approx. 10.5” from CO and 8.5” wide lying flat

    Gauge: 14 sts and 24 rows = 4” in st st on 6 mm
    Yarn: 100g, 140 yds (128 m) bulky weight yarn
    Suggested Brand: 1 skein Lorna’s Laces Shepherd Bulky shown in Edgewater

    Needles/Hooks: 6 mm 16″ circular, 6 mm dpns
    Other Materials: tapestry needle or teeny crochet hook

    Instructions:

    CO 66 sts

    Rnd 1: purl
    Rnd 2: knit
    Rep these two rnds once more.

    Knit 4 rnds.

    Rep first four rnds once more.

    Knit until hat measures 10 inches from beg.

    Dec Rnds:
    Rnd 1: *Knit 4, K2tog*, repeat from * to * to end of rnd.
    Rnd 2 (and all even rnds): Knit
    Rnd 3: *Knit 3, K2tog*, rep from * to * to end of rnd.
    Rnd 5: *Knit 2, K2tog*, rep from * to * to end of rnd.
    Rnd 7: *Knit 1, K2tog*, rep from * to * to end of rnd.
    Rnd 9: *K2 tog*, rep from * to *  to end of rnd.

    Cut yarn and pull through rem sts. Weave in ends.

    Seaflower Scarf

    This scarf is an easy classic with a little flavour. The pattern includes some good tips on scarf building, making this a superb first scarf, especially to practice your knits and purls.


    Craft:
    knitting
    Skill Level: Rookie-Apprentice-Virtuoso-Genius
    Skills: knit, purl

    Sizes: one size
    Finished Measurements: approx. 6″ wide and 75″ long lying flat

    Gauge: not important (22 sts = 4″ as given on ball band)
    Yarn: 200g, 216 yds (200 m) super bulky weight yarn
    Suggested Brand: 4 balls of Twilleys of Stamford Freedom wool shown in 408 “Moorland”

    Needles/Hooks: 8 mm straight needles; medium crochet hook (to attach tassels)
    Other Materials: tapestry needle or teeny crochet hook

     
    Instructions:

    Using a hardcover book that is as wide as you would like your tassels to be long, wrap yarn around approx. 55 times. Set aside.
    The advantage of making your tassels ahead of time is that you can now knit your scarf until you run right out of yarn and won’t have to guess when to finish.

    CO 15 sts (or an odd number).

    Row 1: K1, P1

    Repeat this row until scarf reaches desired length or until you run out of yarn. (Knits and purls should work out to fall opposite of each other, so that knits are sitting on top of purls and vice versa).

    BO and weave in ends.

    Pick up your book and cut the wraps at one side only. The advantage of using a hardcover book is that you can slide your scissors under the yarn at the edge where the pages are, but be careful not to wreck your book. You should have 55 strands that are twice as long as the width of your book.

    Using three strands at a time, use your crochet hook to pull through and secure tassels at each end of your scarf: Insert your hook at one corner; hook three strands and pull through, pulling up a loop; turn hook and pick up the six loose ends of the strands; pull through and pull tight. Make seven tassels along each end.

    With the yarn that is leftover from your tassels (you should only need 42 strands for that), cut remaining strands at various lengths and using your crochet hook, attach randomly to your scarf on one side only (using the same method you did for the tassels).

    Coralish Hat and Flower Pattern

    This pattern is designed to suit any yarn and can be made to fit any size head. The lattice stitch makes it lightweight, but it is quite warm if made with a lopi wool. Pattern also includes a flower add-on.


    Craft:
    crochet
    Skill Level: Rookie-Apprentice-Virtuoso-Genius
    Skills: ch, sc

    Sizes: any
    Finished Measurements: any

    Gauge: dependent on yarn choice
    Yarn: 50g, 150 yds (137 m) of any medium weight yarn
    Suggested Brand: 1 skein Istex Alafoss Lopi bulky

    Needles/Hooks: match hook to chosen yarn according to label
    Other Materials: tapestry needle or teeny crochet hook

     
    Instructions:

    Begin by chaining enough sts to fit the circumference of your head (or to the desired size). Be sure the number of sts is divisible by four.

    Ch 1. Join with a sl st to first ch making sure not to twist sts.

    Rnd 1: sc in each st to end of rnd.
    Rnd 2: dc in each st to end of rnd.
    Rnd 3: *ch 4, skip 3 sts, join to brim with a sc in 4th st*, rep from * to * to end of rnd.
    Rnd 4: *ch 4, join with a sc in sp*, rep from * to * until hat is almost desired length (about 4-5 inches).

    Dec Rnds:
    Rnd 5: *ch 3, join with a sc in sp*, rep from * to * to end of rnd.
    Rnd 6: rep rnd 5.
    Rnd 7: *ch 2, join with a sc in sp*, rep from * to * to end of rnd.
    Rnd 8: rep rnd 7.
    Rnd 9: *ch 1, join with a sc in sp*, rep from * to * to end of rnd.
    Rnd 10: *ch 1, sk next sp, sc in next sp*, rep from * to * until hat is closed up.

    BO and weave in loose ends.

    Flower:
    Rnd 1: ch 5, join with a sl st to form a ring.
    Rnd 2: 12 sc in ring, join with a sl st to first sc.
    Rnd 3: ch 6, *sk 1 sc, 1 dc, ch 3*, rep from * to * to end of rnd; join with a sl st to first dc.
    Rnd 4: *1 sc, 5 dc, 1 sc* in each loop; join with a sl st to first ch.

    Fasten off and weave in ends; either use a safety pin to attach it, or just sew it right on.